We have included a brief tutorial below.
You will need a user name and password in order to access the demo server:
user name: admin
password: pw
Try either the Traditional RPC or the RPC with Current Monitoring
RPC Software Tutorial
LynTec RPC web interface allows you to setup, monitor, and control your RPC series panel on three simple, easy web pages.
Login:
You will need to login to access the demo.
User name = admin
Password = pw
Status
The Status page allows you to monitor the current status of the breakers in the panels. Breakers cannot be controlled from this page.
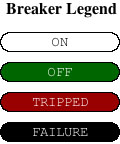
Note: The colors in the legend on the left side of the screen correspond to the individual breaker status in the middle of the screen.The colored square boxes on the right represent zones or breaker groups and correspond to the colored boxes surrounding the breaker number.

Control
The Control page allows you to control breakers individually or in groups. Just click on the individual breaker button in the center of the screen or the colored zone buttons to the right to turn it on or off.
Clicking on the zone button on the control page toggles all of the breakers together. If some of the breakers were manipulated individually, their status will not change. Example: There are six breakers in group 2. The group 2 zone button indicates that group 2 is toggled on, however three of the breakers are toggled off. Clicking on the group 2 zone will toggle the remaining breakers off so that every breaker in the group has the same status.
Use the “All ON/OFF” button to turn ALL the breakers on or off. This feature cycles through each zone in numerical order and follows designated delay settings.
![]()
Use the “ZIPOFF” button to manually activate the emergency shutdown procedure. This feature leaves designated breakers on during a shutdown.
![]()
Setup
The setup page allows you to name your venue and panel, as well as date the setup. You also can choose how you would like to number the panel—left-to-right or top-to-bottom.

Breaker Management
The setup page allows you to scan the breakers in your panel and automatically populates the webpage. You may choose to name each breaker.
![]()
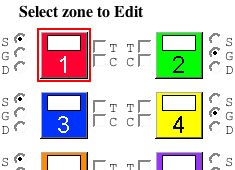
Organizing breakers in to groups/zones is simple. Simply select the zone from the colored boxes at the right of the screen, click on the zone first and then click on the breaker that you would like to assign to that zone.


Before assigning the breakers to a zone you must decide whether you would like all the breakers to switch on at virtually the same time (25ms intervals) or if you would like to create a sequence and set the interval between each breaker. Simply select “G” for group or “S” for sequence.

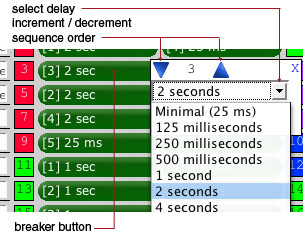
If you choose to sequence a zone, and add a breaker to that zone, a popup will appear. You may then choose the order of the breaker in the sequence and the delay interval between the steps for each breaker.
To control a zone with a contact closure, click the contact closure “C” option next to the zone. For the purposes of this demonstration, this feature has been disabled.
The “T” option next to the zones enables the timer function. For the purposes of this demonstration, this feature has been disabled.
You may choose to create up to 12 zones. Zones not in use may be disabled by selecting “D” next to the zone in the setup page. If disabled on the setup page, zones will not appear on the control or status pages.
Panel Management Features
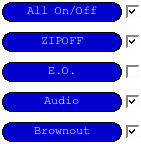
Panel management features require a one-time setup by checking a box to enable. Options include:

Note: this demo does not allow actual operation of the “EMERGENCY OVERIDE”, “AUDIO” & “BROWNOUT” functions.

When you’re finished, be sure to click “SAVE CHANGES“. Changes on the setup page will be lost if the changes aren’t saved!
![]()

